Monday 1 June 2015

How to get all In-App Purchases for FREE in Android *root* Guide using Freedom

THIS GUIDE IS ONLY FOR TESTING PURPOSES  AND NOT FOR ILLEGAL PURCHASES.


Hey guys thus Shubham aka ThunderBolt. Ater using android apps and games you must be familiar with google in-app purchases which may even cost upto hundreds USD. Well those of you who don't know what the hell is in-app purchases are, they are the purchases found in android apps and games required to buy coins, cash, remove ads etc. Now my friend, you can get all of them for absolutely free using Freedom app.


How to use Freedom app to get all in-app purchases for free:
  1. Use should have a rooted android device.(go here to root your phone)
  2. Downlaod and install freedom app from here.
  3. Now open Freedom app and give it root access.
  4. Now tap on the application whose in-app purchases you want to be free.
  5. The app will now show loading and after that you're good to go and when you will try to buy an in-app purchase you will see that your purchases has been completed by a free card.

Well That's it folks.

Thanks for visiting my blog ! Kepp visiting.
I hope you like my content , please  comment regarding it.

Peace.

Thursday 28 May 2015

How to increase smoothness of Android Lollipop 5.0 via L Speed MOD

Hi guys this Shubham aka ThunderBolt. Android released its latest mobile OS last year that is Android Lollipop, but it worked real smooth only on the high end devices. And all the budget devices who were lucky enough to get lollipop, couldn't enjoy it completely. Well guys, now you can using this Android L Speed MOD. This MOD improves L's performance in many ways like lesser RAM usage, better UI in terminal, overall better performance,lesser lags, faster internal external storage read-write, better battery life, good CPU tuner, battery caliberation, seeder entropy, kernel tweaks, and many other features.


Now to install L Speed Mod you need to:

  1. Get a working TWRP Recovery(see my other post)
  2. Download the MOD zip file from here.
  3. Then power off your device, and press the volume up and power button simultaneously to get onto recovery.
  4. Now tap install, navigate to the file, tap on it and swipe to flash it
  5. You're good to go.
  6. Just in case if you want to uninstall this MOD flash(install) this file.


Well That's it folks.

Thanks for visiting my blog ! Kepp visiting.
I hope you like my content , please  comment regarding it.

Peace.

Beast Custom Android Kernel for Xiaomi Redmi 1S aka Armani

HI guys this Shbuham aka ThubhderBolt. As a rooted redmi 1s user many of you would want to increase the performance of the phone by using the kernel, but can't due to the poor stock kernel. Well, then you guys are in the right place. Cause i will show you how to install beast kernel on your redmi 1s to increase its performance via device control app.


Following are the features of Beast kernel for Lollipop:

  • Compiled with Linaro Toolchain @Cl3Kener
  • ALUCARD/ABYSSPLUGV2/ADAPTIVE/DARKNESS/IMPULSE/LIONHEART/NIGHTMARE/PEGASUSQ/ZZMOOVE ETC CPU Governors
  • MSM_CPUFREQ/CONSERVATIVE/MSM-ADRENO/SIMPLE_ONDEMAND ETC ETC GPU Governors
    - BFQ/SIO/FIOPS/Zen IO Schedulers
  • MSM HOTPLUG and ALUCARD HOTPLUG and AutoSMP (Enable by Default) @myfluxi & @neobuddy & @alucard24 & @mrg666 
  • CUSTOM MSM THERMAL CONTROL @franciscofranco
  • FAST CHARGE
  • VIBRATE INTENSITY CONTROL
  • NEON SUPPORT
  • CPU UNDERCLOCK
  • DYNAMIC FSYNC CONTROL
  • USB KEYBOARD/MOUSE SUPPORT
  • OVERALL STATS (for better stats of CPU Core's) @faux123
  • OPTIMIZED AES AND SHA1 ROUTINES
  • NEON ACCELERATED XOR IMPLEMENTATION
  • Using AnyKernel 2.0 Template @osm0sis and many others
 Following are the features of Beast kernel for Kitkat:
  • Compiled with HyperLinaro Toolchain @frap129
  • ABYSSPLUGV2/ADAPTIVE/DARKNESS/DANCEDANCE/LIONHEART/NIGHTMARE/PEGASUSQ/WHEATLEY ETC ETC CPU Governors
  • MSM_CPUFREQ/CONSERVATIVE/MSM-ADRENO/SIMPLE_ONDEMAND ETC ETC GPU Governors
    - BFQ/SIO/FIOPS/Zen IO Schedulers
  • ALUCARD HOTPLUG @Alucard24 & @neobuddy
  •  S2W && DT2W @thewisenerd
  • New KCAL COLOR CONTROL DRIVERS @savoca
  • GPU OPTIMIZE & OC AT 550mhz
  • VIBRATE INTENSITY CONTROL
  • NEON SUPPORT
  • CPU UNDERCLOCK
  • DYNAMIC FSYNC CONTROL
  • EXFAT SUPPORT
  • USB KEYBOARD/MOUSE SUPPORT
  • OVERALL STATS (for better stats of CPU Core's) @faux123
  • OPTIMIZED AES AND SHA1 ROUTINES
  • OVERCLOCK SLIMBUS (for better audio quality) @neobuddy
  • NEON ACCELERATED XOR IMPLEMENTATION
  • TEN NEW TCP CONGESTION CONTROL (Westwood, Yeah, Veno, Vegas, SCALABLE, LP etc)
  • VNSWAP/FRONTSWAP/ZSWAP thanks @faux123 and many more.....

How to Install:
  1. First Download the kernel either kitkat or lollipop. 
  2. Get a working TWRP(see how to).
  3. Then power off your device and press volume down and power button simultaneously to reboot into recovery mode.
     
  4. After touch on install and navigate to the folder where you saved the kernel zip, now touch on it and swipe to install.


After that click on wipe cache/dalvik, go back, then reboot system.
To enjoy and edit the features of Beast Kernel download device control either from play store or from here.

Well That's it folks.

Thanks for visiting my blog ! Kepp visiting.
I hope you like my content , please  comment regarding it.

Peace.

Wednesday 27 May 2015

How to MOD Android Games without PC *root* Guide

Hi Guys this is Shubham aka ThunderBolt. You should have heard of MOD android games which have modifications in the gameplay. If you would like to MOD your gmaes downloaded from Play Store without losing Play Store Updates. Then you can do it all using XMOD Games. Remeber that it requires root and work with only a few popular games.

Well to MOD Games you need to:
  1. You need a Rooted Device(see how to)
  2. XMOD Games Installed(download from here.)
  3. Now Open XMOD and intall MOD of the desired game and launch it.
  4. Now tap on X icon to turn the MOD on and you're good to go.
Well That's it folks.

Thanks for visiting my blog ! Kepp visiting.
I hope you like my content , please  comment regarding it.

Peace.
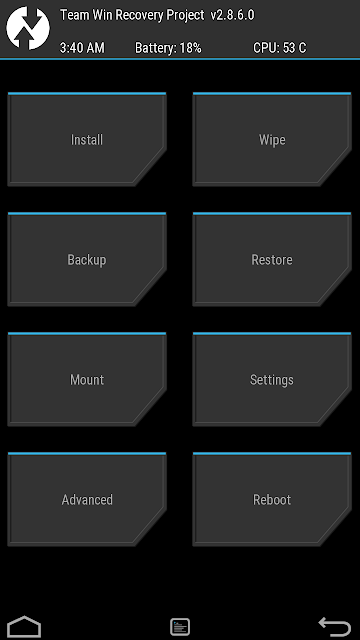
Enabling Ambient Display on an Android Device.

Hi guys this is Shubham aka ThunderBolt. Hey, have you ever heard about Moto X's feature to half-wake up when it recieves notifications called Ambient Display. Did you liked it, then stay tuned folks because i will be telling you how to get it on your Android Device.


The image shows ambient display feature on Nexus 6. For enabling it on your device your device should has this feature, to see if its there follow my steps:
  1. Open Settings app and go to Display menu.
  2. After that select Ambient Display and you're good to go, and if it isn't then ican't do anything except for Nexus 6 and 5 as they have a xposed module for that.

Well That's it folks.

Thanks for visiting my blog ! Kepp visiting.
I hope you like my content , please  comment regarding it.

Peace.

Ambient Display Feature on Redmi 1S aka Armani

Hi guys this is Shubham aka ThunderBolt. Hey, have you ever heard about Moto X's feature to half-wake up when it recieves notifications called Ambuent Display. Did you liked it, then stay tuned folks because i will be telling you how to get it on your Redmi 1S.


The image shows ambient display feature on Nexus 6. For enabling it on your Redmi you need to install CyanogenMod 12.1 R8 on your Redmi 1S. Click on the link to see how to do it.
After that follow my steps:
  1. Open Settings app and go to Display menu.
  2. After that select Ambient Display and you're good to go.

Well That's it folks.

Thanks for visiting my blog ! Kepp visiting.
I hope you like my content , please  comment regarding it.

Peace.
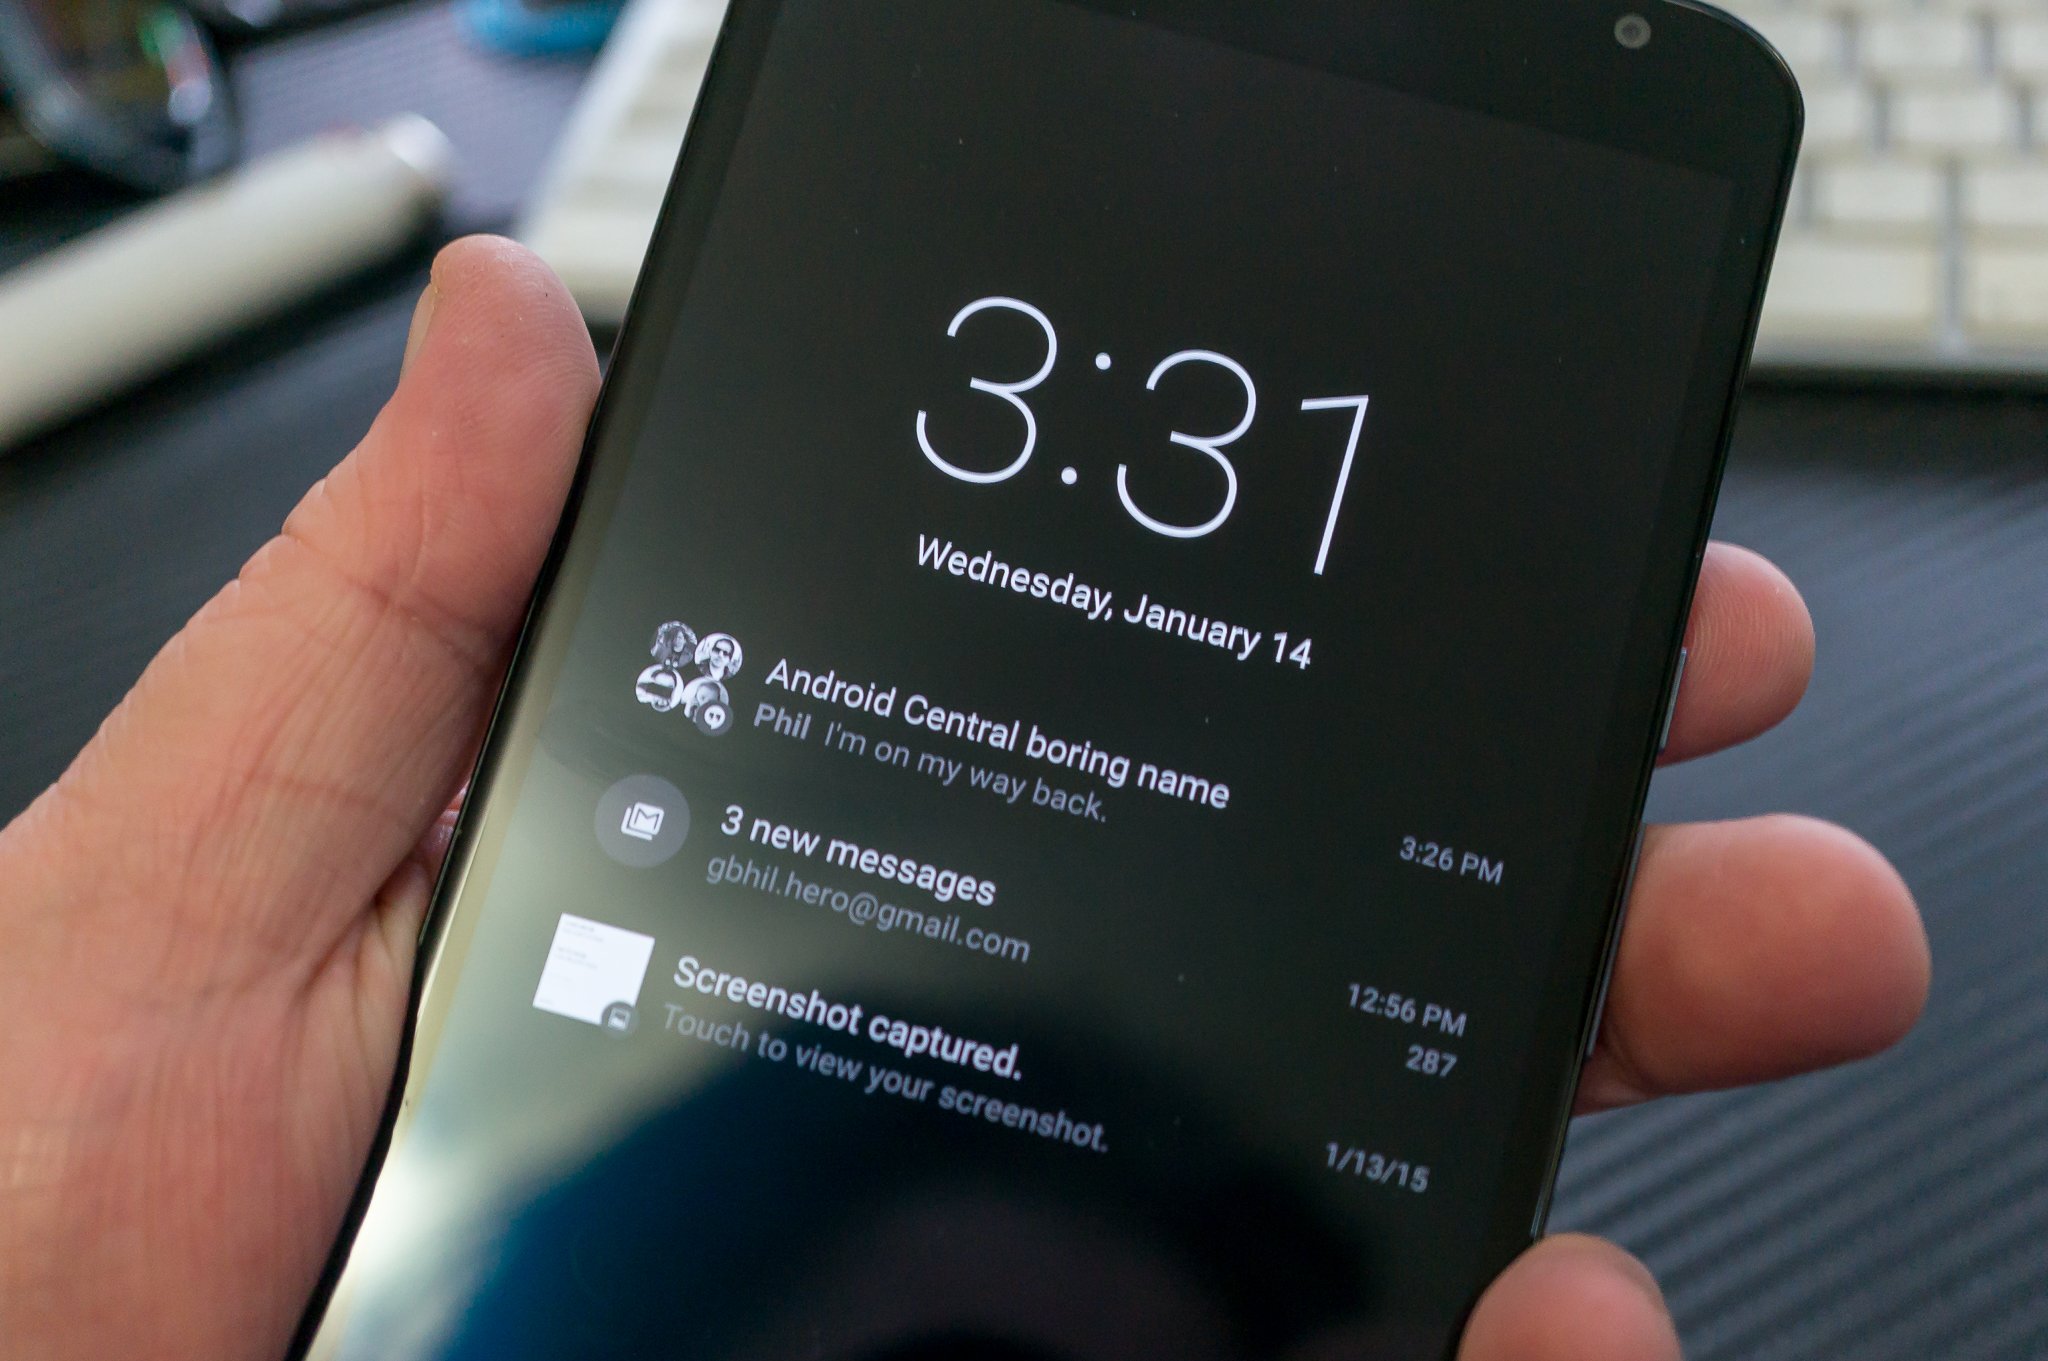
Installation Guide for Cyanogen 12.1 R8 Android 5.1.1 for Redmi 1S aka armani

Hi guys this is Shubham aka thunderbolt . I'm going to show you how to install cyanogen mod on your Xiaomi Redmi 1s. As a Redmi 1S user you would know that the stock ROM that is the MIUI is very heavy on the system , has custom icons and consumes too much resources . If you want to get rid all of this and want to upgrade to android 5.1.1 then you will absolutely like cyanogen mod . After installing cyanogen mod your device's UI will look like a Google nexus device.


Prerequisites for installing cyanogen mod on your Redmi 1s -
  1. Rooting Redmi 1S.
  2. Installing TWRP (Team Win Recovery Project) recovery on your Redmi 1s.
  3. Downloading CyanogenMod .zip package.
  4. Download PAGapps (Paranoid Android Google Apps) package.
  5. Flashing both the downloaded files.

Step 1-Rooting Your Redmi 1s(without voiding warranty):
     1.Download the following zip file from the given link


              Root For Redmi 1S


2.After downloading this file head to the updater app present on homescreen of MIUI by default. After opening it press menu button and press 'Select Update Package' after.that select the 'update.zip file from the downloads folder.


Updater app miui
Updater App MIUI


3. After this the app will ask you if you really want to install the package , after selecting yes the phone will
     reboot to recovery mode and the zip file will be flashed.                                                                                      


     4. When the phone will be turned on go to the security app , also present in miui by default , then enable 'root permission' under permissions section. After that your phone will be successfully rooted.


Enabling root permission
Enabling Root Permission.


Step 2- Installing TWRP(Team Win Recovery Project) recovery on your Redmi 1S.
    1.After rooting your phone, install 'Flashify' app on your phone either from Google Play® or download it from the following link-

                         Download Flashify

2.Then open flashify and select 'Recovery Image'. After that a window will open , select 'Download TWRP'. Remember to give flashify root access by allowing it root access. After that TWRP will be downloaded, flashify will automatically install it and it would ask you if you want to reboot, select yes.


Flashify
Flashify


    4. After a reboot you will see TWRP installed. Now go to 'Reboot' and select 'System.


TWRP Menu
TWRP Menu


Step 3- Downloading CyanogenMod
   
              
            CM12.1 R8 For Redmi 1s Android 5.1.1


Step 4- Downloading PA GApps 5.1.x


             Download PA Gapps for 5.1.x


Step 5- Flashing both the files

1.Power off your phone, after that hold the power button and volume button together to boot into recovery mode.
2. Now go to 'Backup' and perform a backup of your phone, just in case something goes wrong.
3. After that go to 'Wipe' > 'Advanced Wipe' and select cache, dalvik cache , system and data.
4. Then go to 'Install' and navigate to the folder in which both cm12 and pagapps are stored.
 5. Select cm12 and then select add more zips to select pagapps, after that swipe to flash both of them and then CyanogenMod will be successfully installed.
6.Now to avoid bootloops select 'wipe cache/dalvik'. Now reboot your phone and complete the setup.


Advanced Wipe


Installation in TWRP Sample


Well That's it folks.

Thanks for visiting my blog ! Kepp visiting.
I hope you like my content , please  comment regarding it.

Peace.

How to MOD CyanogenMod's Audio FX and fix it guide

Hi guys this is Shubham Lamba aka ThunderBolt. Hey! Do you have cyanogen installed in your device? But going crazy due to malfunctioned Audio Fx app, then you can MOD and fix it.

To fix Audio FX you have to just follow these steps:


  1. Download Audio FX ZIP file from here.
  2. Then move this file into root directory of your internal storage.
  3. You should have a working TWRP Recovery Mode.(see how to install)
  4. Then power off your device and then press volume up button and power button simultaneously, this will get you into TWRP Recovery.
  5. Now tap on Install.

  6. After that navigate to the folder where you saved the file.
  7. Now touch on it and swipe to install it, and then reboot the system and you're good to go.


Well that's it folks!

Thanks for viewing my blog, I hope you liked it. Dont forget to write comments and like my blog.

Peace.

How to Install DSP Manager in Android L

Hi guys this is Shubham Lamba aka ThunderBolt. Hey! Do you remember the DSP Manager present in Cyanogen 11. But if you liked it and now you want to get in your new cyanogen 12, then i will be helping you in doing this. The main benefit of getting DSP Manager in CM12 is that, in some devices the cm12's Audio FX(the new DSP) doesn't works. So it is the same case with you then you can install DSP Manager to get a working equaliser in your device.

To get DSP in your device you have to just follow these steps:

  1. Download DSP Manager ZIP file from here.
  2. Then move this file into root directory of your internal storage.
  3. You should have a working TWRP Recovery Mode.(see how to install)
  4. Then power off your device and then press volume up button and power button simultaneously, this will get you into TWRP Recovery.
  5. Now tap on Install.

  6. After that navigate to the folder where you saved the file.
  7. Now touch on it and swipe to install it, and then reboot the system and you're good to go.


Well that's it folks!

Thanks for viewing my blog, I hope you liked it. Dont forget to write comments and like my blog.

Peace.

How to get Native Root in Cyanogen 12.x Guide | How to Enable Root in CM12

Hi guys this is Shubham Lamba aka ThunderBolt. Cyanogen has already released its new version that is cm12 with more features and better performance. Now those of you who wonder where is the superuser menu that used to be present in settings cm11. Well the thing is that the guys at cyanogen have removed it and made the settings simpler. Now those of you who have cyanogen in their phones either from cyanogen site or my post, if wonder how to enable root in cm 12 then don't close your window.


Well its very easy to enable root for apps as well as ADB(Android Debugging Bridge) in Cyanogen Mod 12, just follow my instruction:

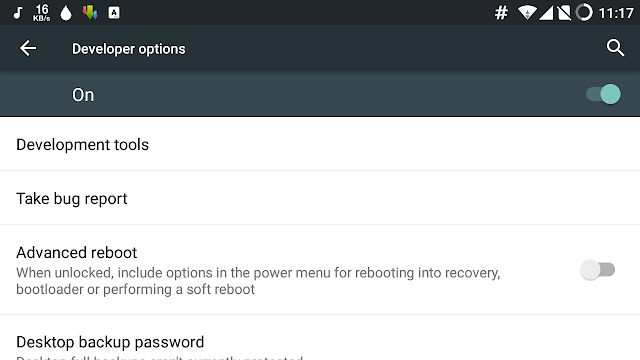
  1. Open your settings and enable your developer options. (see here how to do it.)
  2. Then open Developer Options.
  3. Now scroll down and touch on root access.
  4. After that select Apps and ADB for full root access on your device.
  5. Now android will give you warning about turning root acces on(blah blah blah ;P), press OK and you're good to go.
Well that's it folks!

Thanks for viewing my blog, I hope you liked it. Dont forget to write comments and like my blog.

Peace.

Tuesday 26 May 2015

Recover saved Wi-Fi Passwords in Android *root* Guide

Hi guys this is Shubham aka ThunderBolt. Have you ever wondered where are android wifi passwords are stored, and how to see them, then this post is just for you. Well for this method you need a rooted device and my favourite app root browser.


  1. Well if your device isn't rooted then see how to on this page.
  2. After that install root browser from google play store.
  3. Then open it and give root access when asked (maybe asked later after opening)
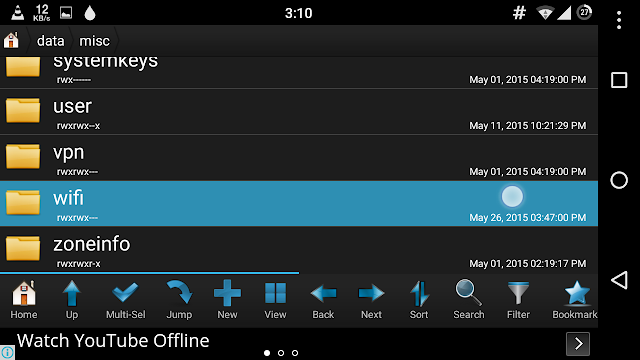
  4. Then go to the most upper level and open data folder.
  5. Then go to misc folder.
  6. Now open wifi folder.
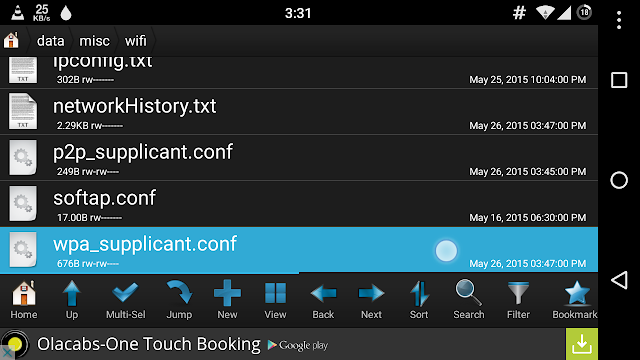
  7. Now open wifi-suplicant.conf file using rb text editor.
  8. After scrolling down a little the file will look something like this.
  9. Now the value of ssid here is the name of network and the value of psk is the password.

Well thats it for today.

Thanks for viewing my blog, I hope you liked it. Dont forget to write comments and like my blog.

Peace.

How to Recover Deleted files from Android *root* without PC | Guide for Root Users

Hi guys this is Shubham aka ThunderBolt. Have this ever happened to you accidentally deleted a file from your android device and want it back, then you can easily recover it using my method. This method requires a rooted device. If isn,t then see how to do it here.

After rooting your device install Disk Digger either from Play Store or from here.

Then open it and select the partion from which you want to recover files from, then select type of files you want to recover and disk digger will show its magic.

Well thats it for today.

Thanks for viewing my blog, I hope you liked it. Dont forget to write comments and like my blog.

Peace.

Monday 18 May 2015

Enabling Home Screen and Global Rotation Android Non Root Guide

HI guys this Shubham aka ThunderBolt. For all those of you who want home screen, lock screen and global rotation in their phone. It is very easy to do so, and root is not required. So that means that you can open every app in any rotation without the need of root.


Well, using this method you can get get global rotation anywhere like homescreen, app drawer, lock screen, or any app that has a fixed rotation like shown above. 


Prerequisites for enabling global rotation
  1. Ultimate rotation control download from either Google Play or from here.
  2. An Android Device. 


After installing the app open it and enable it to enjoy global rotation. You can adjust according to your liking.


TIP: To use the app after the trial ends, just clear its app data from settings and set it up again.


Well that was it. I hope liked my blog, please give suggestion. Thanks.


Peace


Monday 11 May 2015

How to Root Moto G 2nd Gen 2014 Install Custom Recovey Unlock Bootloader | Fastboot Method Guide

Hi guys this Shubham aka ThunderBolt. Today I will be showing you how to root Moto G 2014 by Unlocking its Bootloader and installing custom recovery. Rooting Moto G is not much that easy, but customizing the phone after is much easy. You can install root apps and custom ROMs in your device after rooting yourBut do remember that this will VOID WARRANTY AND WIPE YOUR INTERNAL MEMORY AND APPS. So do it on your own risk.


To root your Moto G 2014 you'll need the following things:
  1. Moto G 2014 ;P (get it from here.)
  2. Fastboot ADB zip (get it from here.)
  3. Motorola USB Drivers (get them from here.)
  4. Micro-USB Cable (get it from here.)
  5. Google Account or Motorola ID login details.
  6. TWRP Downloaded (get it from here.)
Now follow me step by step to root your moto g.
  1.  First Download the Motorola drivers and install them, then reboot your pc.
  2. After that download the zip file and extract it to a folder.


  1. After that Power off your device, and when it vibrates press the power and volume button simultaneously to get into Bootloader.
  2. Now go the the folder where you extracted the zip file and press shift+right click in a blank space and select open command window here.
  3. After that connect your device to your pc via USB cable, now the Bootloader will show USB connected.
  4. Then type fastboot devices in the command prompt to see your device. Don't close the command prompt.
  5. Now type fastboot oem get_unlock_data in the commandprompt to get large code.
  6. After that right click on this code and go to Motorola site, and after logging in with your device's google or Motorola ID paste this code in the given space. Remember to remove all spaces in the code, then click on check and click on get code. This will send an Email containing a code, copy this and go to command prompt and type fastboot oem unlock unique key . Unique is the code received in your Email. Paste using right click.
  7. Now move the TWRP file into the folder where you extracted the zip file, as in the image. Now remain it to recovery.img(this includes the file format) . Now open the command window and type fastboot flash recovery recovery.img , now wait and disconnect the USB when everything's done. now go to recovery by using volume keys in the Bootloader of your phone.
  8. This will boot TWRP, now select reboot-system, when you will select this it will ask you if you want to install supersu, that is root your phone, swipe to root your phone.
  9. After that your device will reboot and you will be in setup wizard and after that you're done.
 
 
Well that's it for today. Keep visiting my blog, I hope you liked it. Thanks, please comment before leaving.

Saturday 9 May 2015

How to create custom themes for CyanogenMod without PC

Hi guys this is Shubham aka ThunderBolt. Today I'm going to show you how to create custom themes for CyanogenMod. If you couldn't find a suitable cyanogen theme then creating a custom theme is the only choice left. I will teach you to do this without using PC. So this means you can create themes on the go. Do remeber that this theme engine is mainly for creating themes for CM 12 or up.


To make and apply cyanogen themes you need the following:
1. CyanogenMod Installed get ot from here
2. Theme DIY get it from here
3. Little Creativity ;P


After downloading the app open it and tapp on add, then select 'Create New Theme'. You can also edit preinstalled themes. If it doesn't then it clear its app data from app info.


After selecting create new theme you'll be asked the following things:
1. Theme Name: Enter the name of your theme.
2. Base Template: If you want your theme to be dark then go for dark, and light for a light theme.
If you are making a theme for android L then select material, otherwise select translucent.


3.Acent Colour: It is the colour present on switches, ripple effects, buttons etc.
4. Status Bar Colour: It colour of the status bar.
5. Action Bar Colour: It is the colur of the bar below the status bar, present in many material design apps.
6. Navigation Bar Colour: It is the colour present in the navigation bar i.e. the bar in which home, back and recent buttons are present.
7. Settings Icons: It is the colur present in settings, and many other apps also. It also includes their icon colour.
8. Dark Background: You can choose the colour for dark backgrounds here.
9. Light Background: You can choose the colour for dark backgrounds here.
10. Action Bar Text: Choose the colour for action bar text here.
11. Dark Text: Choose the colour for dark text.
12. Light Text: Choose the colur for dark text.


Remember that you can preview your theme buy touching the icon in the upper right corner.


13. Notification Header Colour: It is the colour of the area in which time, battery status and the user image that is present just above the notification area
14. Quick Settings Background: It is the colour of the quick settings background, this colour is also used in volumes panel.
15. Toggles Colour: It is the colour of quick settings toggles.
16. Toggles Text: It is the colour of quick settings' toggle namBack
17. Notification Item Background: It is the colur of notificaton background.
18. Notification Text Colour: It is the colour of notification detail text.
19. Notification Item Icon Background: It is the colour of icon background of notifications of android L.
20. Brightness Slider: This the colour of the brightness slider.


21. Wallpaper: Choose a homescreen wallpaer for your theme.
22. Lockscreen Wallpaper: Choose a lockscreen wallpaper fornyour theme.
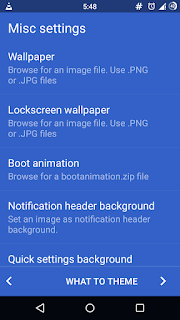
23. Boot Animation: Choose a boot animation zip file for your theme.
24. Notification Header Background: Choose an image file for the notification header.
25. Quick Settings Background: Choose an image file as quick settings background.
26. Settings Header: Choose an image file as a background for setting action bar.


27. What To Theme: Here you can all the apps you want to theme


28. Fonts: You can set custom fonts for your theme from here.

Now wait for the app to build the theme, after that you can intall it.

Well that's it for today, thanks for visiting my blog, I hope you liked it. Fell free to comment.

Peace.

Friday 8 May 2015

How to Install Xposed Framework on Android 5.1.x | Installation guide

TO DOWNLOAD THE LATEST XPOSED


VERSION GO TO THIS LINK
Hi guys this is Shubham aka thunderbolt. I'm going to show you how to install xposed framework on android 5.1.x. It is not natively supported on android L but by using custom recovery it can be done. You should have noticed that xposed is not being installed in android 5.1.1 with the file i provided before. Note that not all xposed modules are compatible with android L. 

Here is a list of all xposed modules completely compatible with android L.


  • Advanced Power Menu+
  • All Notifications Expanded
  • Always Expanded Notification
  • Amplify
  • Audio Privacy
  • Battery History XXL
  • Boot Manager
  • Bubble Unp
  • Burnt Toast
  • CPUTemp In Statusbar
  • Crappa Links
  • Disable Proximity SSensor
  • Enable Ambient Display Xposed
  • Enable SwiftKey Predictions on More Fields
  • Flat Style Bar Indicator
  • Flat Style Coloured Bars
  • Flat Style Coloured Keyboard
  • Flat Style Module
  • Force Immersive Mode
  • Gravity Box(LP)
  • Hide Network Indicators
  • Keepchat
  • Lollipop Power Menu
  • Map Zoom Invert
  • Max Lock
  • MinMin Gaurd
  • Native Clipboard
  • Network Speed Indicator
  • Niwatori
  • No Wireless Charging
  • Pandora Patcher
  • Play Store Changelog
  • Remove Battery Saver Warning Colour
  • Resflux
  • Restore Notification Ticker On Lollipop
  • Root Cloak
  • Screenshot Delay Remover
  • Sense 6 Transparent Recents
  • SIM Number Changer
  • SMS+ Tethering Enabler
  • Snapprefs
  • Statusbar Scroll to Top
  • SwipeBack
  • SwypeTweaks
  • Tinted Statusbar
  • Unicon
  • Volume Steps+
  • WiFiKeyView
  • XInstaller
  • XInternalSD
  • Xposed Torch
  • XSSID Indicator
  • XSuite
  • Xtended Navbar
  • XToast

    Many more xposed modules which are compatible android L are on thier way you can download them and those which are may be compatible with android L from here.


    But do remember that the framework willl be uninstalled when an system update is installed.


    Now I'm going to show you how to install xposed on lollipop.

    1. First Download these files Xposed Framework and Xposed Installer alpha apk.
    2. After that go to recovery and install the zip file by going to 'INSTALL' or 'SELECT ZIP FROM SD' then go to the folder where the zip file is stored and flash it, then reboot your device.
    3. After that you only need to install the apk and voilĂ  you will be able to use xposed on lollipop. 
    Thanks for viewing my blog, I hope you liked it. Dont forget to comment and like my blog.

    Peace.

    Thursday 7 May 2015

    Mokee ROM 51.1 Android 5.1.1 for Redmi 1s aka armani installation guide

    Hi guys this is Shubham aka thunderbolt . I'm going to show you how to install Mokee ROM on your Xiaomi Redmi 1s. As a Redmi 1S user you would know that the stock ROM that is the MIUI is very heavy on the system , has custom icons and consumes too much resources . If you want to get rid all of this and want to upgrade to android 5.1.1 then you will absolutely like Mokee Rom . After installing Mokee ROM your device's UI will look like a Google nexus device. The differnce between mokee rom and cyanogen is that mokee has some extra features and recieves more updates, thus has less bugs and is more stable than cyanogen.


    Prerequisites for installing Mokee ROM on your Redmi 1s -
    1. Rooting Redmi 1S.
    2. Installing TWRP (Team Win Recovery Project) recovery on your Redmi 1s.
    3. Downloading MokeeROM.zip package.
    4. Download PAGapps (Paranoid Android Google Apps) package.
    5. Flashing both the downloaded files.


    Step 1-Rooting Your Redmi 1s(without voiding warranty):
         1.Download the following zip file from the given link


                  Root For Redmi 1S


    2.After downloading this file head to the updater app present on homescreen of MIUI by default. After opening it press menu button and press 'Select Update Package' after.that select the 'update.zip file from the downloads folder.


    Updater app miui
    Updater App MIUI


    3. After this the app will ask you if you really want to install the package , after selecting yes the phone will
         reboot to recovery mode and the zip file will be flashed.                                                                                      


         4. When the phone will be turned on go to the security app , also present in miui by default , then enable 'root permission' under permissions section. After that your phone will be successfully rooted.


    Enabling root permission
    Enabling Root Permission.


    Step 2- Installing TWRP(Team Win Recovery Project) recovery on your Redmi 1S.
        1.After rooting your phone, install 'Flashify' app on your phone either from Google Play® or download it from the following link-

                             Download Flashify

    2.Then open flashify and select 'Recovery Image'. After that a window will open , select 'Download TWRP'. Remember to give flashify root access by allowing it root access. After that TWRP will be downloaded, flashify will automatically install it and it would ask you if you want to reboot, select yes.


    Flashify
    Flashify


        4. After a reboot you will see TWRP installed. Now go to 'Reboot' and select 'System.


    TWRP Menu
    TWRP Menu


    Step 3- Downloading Mokee ROM 51.1
     
                  
                Mokee ROM For Redmi 1s Android 5.1.1


    Step 4- Downloading PA GApps 5.1.x


                 Download PA Gapps for 5.1.x


    Step 5- Flashing both the files

    1.Power off your phone, after that hold the power button and volume button together to boot into recovery mode.
    2. Now go to 'Backup' and perform a backup of your phone, just in case something goes wrong.
    3. After that go to 'Wipe' > 'Advanced Wipe' and select cache, dalvik cache , system and data.
    4. Then go to 'Install' and navigate to the folder in which both cm12 and pagapps are stored.
     5. Select cm12 and then select add more zips to select pagapps, after that swipe to flash both of them and then CyanogenMod will be successfully installed.
    6.Now to avoid bootloops select 'wipe cache/dalvik'. Now reboot your phone and complete the setup.


    Advanced Wipe


    Installation in TWRP Sample


    Thanks for visiting my blog ! Kepp visiting.
    I hope you like my content , please  comment regarding it.

    Peace.